martes, 18 de febrero de 2014

Saquitos de plátano y chocolate / Banana and chocolate cakes


Hola de nuevo a todos/as
Hoy os vuelvo a traer una receta de cocina. En este caso es un postre o merienda fácilisimo de hacer en menos de 45 minutos tendréis este postre tan rico. Son saquitos de chocolate y plátano

Hi everyone again!
Today I'm writting a recipe again. This time is a dessert really easy to be made. In less than 45 minutes you'll get it ready. It is banana and chocolate pastries.

A continuación os muestro el paso a paso mediante fotos. Espero que os guste.

Here you are the process step by step.

Ingredientes:
- Una masa de hojaldre
- Dos plátanos
- Nocilla, Nutela o similar
- Un huevo
- Azúcar glasse
- Almendras picadas

Ingredients:
- Falky pastry
- Two bananas
- Nutela, Nocilla or similar
- Sugar
- Chopped almonds


Divide la masa de hojaldre en tres partes.

Divide the falky pastry into three parts.


Y después vuelve a cortarla haciendo cuadraditos

Cut it again, this time making small squares


Con la ayuda de un par de cucharillas, pon una bolita de Nocilla sobre la masa de hojadre.

With the help of two teaspons, put a small amount of Nocilla onto the falky pastry.


Sobre la Nocilla, pondremos un trocito de plátano.

On top of the chocolate, put a slice of banana.


Es el momento de doblar las esquinas para formas algo parecido a unos sobrecitos. Báñalos con el huevo previamente batido.

Now it's the time to bend the four corners in order to make something similar to an envelope. And brush some egg, previously shaked, on top.


Añade el azúcar y las almendras picadas.

Add sugar and the chopped almonds.


Los metemos en el horno, previamente precalentado a 180º. Sobre unos 20 minutos después estarán listos nuestros saquitos

And now put it into the oven. It need to be preheated at 180º. In about 20 minutes they'll be ready.


Espero que os haya gustado. Ahora toca disfrutar de estos pastelitos tan ricos. ¡Qué aproveche!

I hope you like them. Enjoy!


domingo, 16 de febrero de 2014

Personaliza tu boda / Have a personalize wedding


Hola de nuevo a todos/as,
Como ya sabéis por publicaciones anteriores que hace unos meses nos casamos y es por esto por lo que estoy haciendo varias entradas relacionadas con bodas.
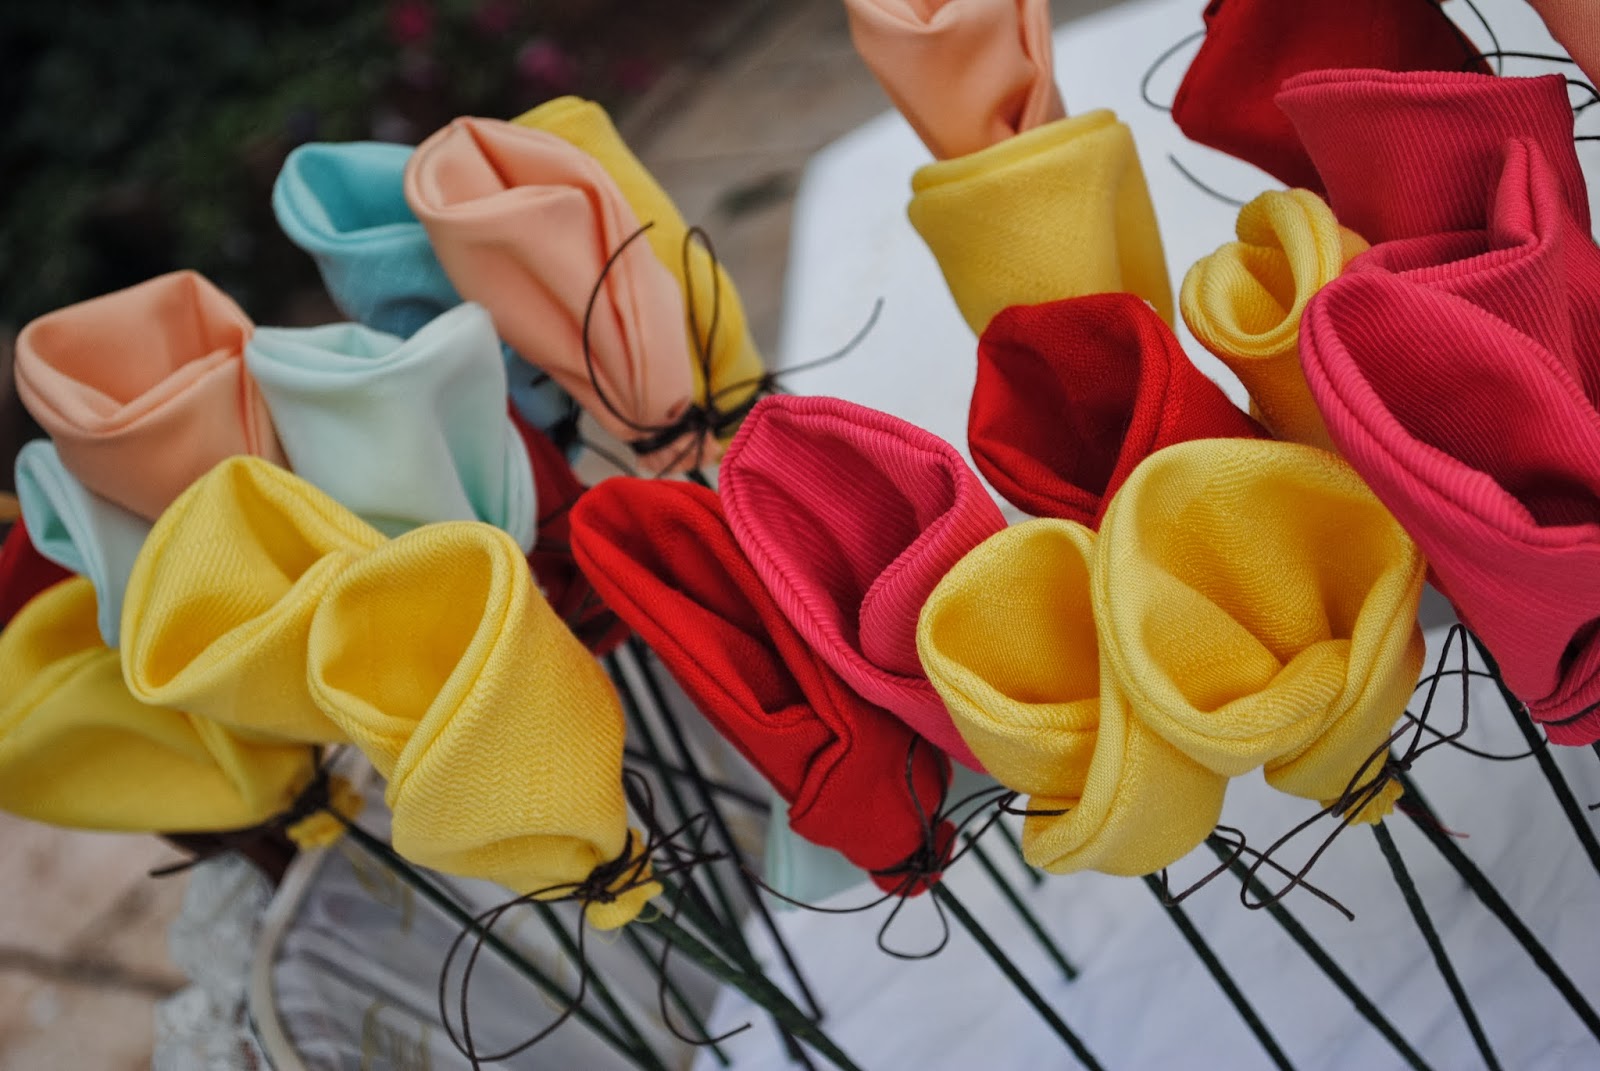
En la entrada de hoy os muestro una alternativa original para el arroz. Al igual que hice con las latas para mostrar los regalos para los invitados. Son unas sencillas flores de tela que yo misma realicé y aquí os muestro el paso a paso en fotos.
Espero que os guste.

Hello everyone,
As you know from previous post, I got married a few months ago, adn that's why I'm writing about weddings in several of my entries.
Today's post is about my own wedding. Like the previous post in which I showed you how I used cans to show the our wedding favor, today I'm showing you a good idea for the rice, as in Spain we throw rice to the brand new married cuople. These are easy-to-do cloth flowers which held the rice inside. Here you have the step-by-step pictures.
Hope you like it.

Materiales:
- Tela (con dos metros salen alrededor de 20 flores)
- Tijeras
- Maquina de coser
- Palitos de pinchito
- Cinta de enmarcar (de venta en tiendas de cuadros)

Materials:
- A piece of cloth (with 2 mettres you get about 20 flowers)
- Scissors
- Sewing machine
- Brochette sticks
- Tape


Lo primero que haremos será dibujar sobre la tela unos círculos. Para ello, yo previamente hice una plantilla en cartón.

The first thing to do is to draw circles on the cloth. To do that, I previously made a pattern.


Cortamos los círculos. Aconsejo que los cortéis mejor en cuadrado que de forma circular, ya que resulta más fácil.

Cut the circle. I recommend you to cut them more like a square, it would be easier for you.


Doblamos el cuadrado que hemos cortado haciendo coincidir las líneas de nuestro círculo y obtendremos media circunferencia.

Bend the square of cloth. You'd get a semi-circle.


Ahora toca coser. Coseremos con la máquina por los bordes del círculo. No coseremos hasta el final, puesto que estamos cosiendo el interior, tenemos que dejar un huequito para poder darle la vuelta.

Now it's time for sewing. You're not going to sew the whole circle. It's needed to leave a space at the end, in order to be able to turn it over.


Cortamos el exceso de tela.

Cut the extra cloth.


Debe quedarnos algo así. Y hay que rematar el final para que quede bonito.
Una vez hecho esto, tendremos que coser la parte recta con un hilván, con el que después rizaremos la parte de abajo de la flor.

You'll get something similar to this. You need to sew the edge in order to get it nicer.
Once you've done this,it is necessary to sew a basting at the straight part wich will help us to curl the bottom of the flower.


Como veis los palos de los pinchitos van envueltos en la cinta que os comenté antes.

You need to wrap the sticks with the tape.


Éste fue el resultado. Las flores clavadas en corcho y presentadas en una cesta. El arroz iba dentro de los capullos.
Los invitados lanzaron el arroz y pudieron conservar las flores como recuerdo.

This was the final result. Rice was inside the flower-bud.
Our guests threw the rice and could keep the flower as a souvenir.


miércoles, 12 de febrero de 2014

Washi Washa, una tienda guay / Washi Washa, a cool shop

Hola de nuevo a todos/as
Hoy voy a hablaros de una tienda que conocí hace poco tiempo y que me robó el corazón. Esta tienda es Washi Washa. Es una tienda online, de Granada, en la que encontramos muchas cosas bonitas y BARATAS, relacionadas con el scrapbooking, el DIY y las cosas bonitas en general.


Hi everyone!
Today I want to tell you about a nice online shop I found out a short time ago and I fell totally in love. This shop is Washi Washa. This shop, although is online, is set in Granada, and we can find a lot of things related to scrapbookingDIY and nice things in general, and everything is really CHEAP!

Estaba buscando tintas para usar mis sellos de caucho sobre tela, cuando encontré esta preciosa tienda, Washi Washa.Como ya os he dicho antes prácticamente todo lo que tienen, está a muy buen precio. Además te envían el pedido por correo, o si lo prefieres puedes recogerlo en un punto de recogida que tienen en el centro de Granada.
Os muestro algunas de las preciosidades que podéis encontrar.

I was looking for ink to print on fabric with my rubber stamps and was then when I found this nice shop, Washi Washa. As I told you before most of the things here are really cheap. They can sent your parcel or even if you are near Granada, you can collect your order in a shop at the city centre.
Now, I'm shwing you some of the gorgeous things you can find in this shop.


Estos cubiertos de madera son lo más para las fiestas primaverales.

This cutlery is so cool for your spring parties


Y hablando de fiestas, ¿qué os parece si utilizamos las pajitas, los moldes para los cupcakes y unas bolitas de papel para decorar? Estos en verde me parecen lo más.

And talking about parties, what about using these straws, little paper bags and cupcakes moulds? These in green are so nice.


Y para los/as amantes del washi tape, ¡mirad que maravillas! Yo sólo he puesto aquí una selección, pero ¡tienen muchísimos más!

And for those who are washi tape lovers, look at these amazing washi tapes! And this is just a small selection I've made.


Además de estas cositas que os he enseñado, tienen muchas más, como lace tape, tintas para sellos, libretitas molonas, etc. Tengo que decir también que me atendió a través de whatsapp, muy útil por cierto, una chica que se llama Lucía y que fue un auténtico primor. ¡Gracias Lucía!
No te pierdas esta página y disfruta de cosas preciosas a precios mini.

Beside those things I showed you, they have a lot of more things, such as lace tape, ink for rubber stamps and nice notepads. I have to add, that I a very nice girl called Lucía, served me via whatsapp, which is very useful. Thank you Lucía!
I hope you enjoy this oline shop.


martes, 11 de febrero de 2014

Bodas, bodas, bodas II / Weddings, weddings, weddings II

Hola de nuevo,
Hoy os traigo otro post sobre bodas. Hoy os voy a enseñar algunas formas de llevar los anillos, espero que os gusten.

Hi there!
Today another post up on weddings. I'm showing you some ways for carrying your wedding rings. I hope you like them.


Un lindo cojín hecho con tela de saco adornado con una flores y la palabra LOVE, me encanta!

A nice burlap cushion decorated with flores and the word LOVE, I love it!


Este corazón hecho de cuerda me parece precioso y muy fácil de hacer. El ramillete de flores le da un aire romántico.

I think this heart made with rope is really nice and very easy to be made. The flowers give a romantic touch.


Enmarcar la palabra LOVE y añadir los anillos atados en el corazón puede ser una alternativa original. De la misma manera coser vuestras iniciales y enmarcarlas puede ser una opción original.

Frame the word LOVE and tie your wedding rings or create your initials and frame them, nice and creative!

Espero que os haya gustado.

I hope you like it.


domingo, 2 de febrero de 2014

A COCINAR: CALABACÍN LUNA RELLENO / COOKING TIME: FILLED ZUCHINI

Hola a todos/as,
Hoy le doy otra vuelta al blog y os traigo una entrada de cocina. Me gusta cocinar, pero sobretodo me gusta comer :-D, así que de vez en cuando, os dejaré alguna receta de cocina.

Hi everyone!
Today I give a change to the blog and I bring you a cooking recipe. I like cooking, but mainly I love eating :-D, so from now on, I'll post some recipes.


¿Habéis oído hablar de los calabacines luna? Es una variedad de calabacín, más pequeño y redondito, lo que lo hace perfecto para hacerlos rellenos y que sea un plato genial.

Have you heard about this kind of zucchini? These are smaller and rounded, so they are great to be filled and served as a great dish.


Como ya os he dicho son perfectos para hacerlos rellenos, así que aquí os dejo la receta que hice el otro día.
Ingredientes para 4 personas:
- 4 calabacines luna (puedes encontrarlos en supermercados Lidl)
- 1 cebolla
- 2 zanahorias
- 1 tomate grande 
- 300g de carne picada.
- Queso rallado al gusto (yo utilicé queso provolone)

Elaboración:
Lava los calabacines y ponlos a cocer en una olla para ablandar la carne y la piel del calabacin. 
Mientras tanto puedes ir pelando y troceando la zanahoria, la cebolla y el tomate. 
Una vez que creas que el calabacín está lo suficientemente tierno, yo lo tuve unos 10 minutos a fuego lento pero no fue suficiente :-(, escúrrelo, corta la parte del cabo y vacíalo con una cucharita o un saca-bolas de cocina. 
En una sartén, calienta dos cucharadas de aceite y pocha la cebolla y el tomate. Una vez que estén listos, añade los trocitos de zanahoria y la carne del calabacín. Deja pochar toda la verdura a fuego lento.
Como os he dicho antes, los 10 minutos de cocción a fuego lento de mis calabacines no fueron suficientes para que la piel se pusiera la suficientemente tierna, así que mientras las verduras se pochaban, metí los calabacines vacíos en el horno a 150º y los tuve alrededor de 20 minutos.
Cuando la verdura estuvo pochada, añadí la carne a la sartén y la salpimenté. Cuando la carne estuvo hecha, añadí dos cucharadas de salsa de tomate, no os lo he puesto en los ingredientes porque es opcional.
Con el relleno preparado, ya sólo queda rellenar los calabacines. Cubre los calabacines con la cantidad de queso que desees y gratínalos en el horno.


As I said before, these zucchine are great to be filled, and I leave you here my recipe.
Ingredients for 4 pax:
- 4 zucchinis
- 1 onion
- 2 carrots
- 1 tomatoe
- 300g minced meat
- grated cheese (I used provolone cheese)
Method:
Cook the zuchinis in boling water for about 20 minutes in order to get the meat and skin soft enough to be eaten. Meanwhile you can chop the onion, tomatoe and carrots. Once the zucchinis are cooked, take them out of the pan and empty them using a teaspoon.
Heat a frying pan with 2 tablespoons of olive oil and cooked the onion and the tomatoes chopped. Once they're cooked add the carrots and the meat you got from the zicchinis, and cook them. After a while, add the minced meat and also put some salt and pepper.
In about 10 minutes everuthing will be cooked, at this time I added a couple of tablespoons of tomatoe sauce, but this is optiona.
Now, the stuffing is ready, so you can fill the zucchine with it.
Cover them with the cheese, as much as you like and cook au gratin in the oven.


¡¡BUEN PROVECHO!!

ENJOY YOUR MEAL!!